A Crispy Chicken Memory from Chef Joudia’s Kitchen
Every time I smell the aroma of crispy chicken cooking — that warm, savory scent filling the kitchen — I’m brought back to my childhood. I used to sit on a small stool, watching my grandmother prepare dinner. She moved with quiet confidence, seasoning everything by hand, never in a rush. I still remember how the chicken thighs sizzled as they hit the hot pan, the skin turning golden and blistered, crisping to perfection. That sound — that crackling music — meant dinner was almost ready, and something special was coming to the table.
Those memories are what inspired me to create this recipe: Air-Chilled Chicken Thighs with Extra Crispy Skin. Over time, I’ve learned that air-chilled chicken holds onto its natural flavor and texture better than anything else. It crisps up beautifully with very little fuss — no heavy coatings or deep frying needed. Just simple ingredients, a few techniques, and a lot of love. Whether you’re cooking for guests or treating your family to something extra, this dish brings tradition and comfort in every bite.

What Makes This Crispy Chicken So Special
There’s more to this dish than just crispy skin — it’s a full experience, built around simplicity, flavor, and comfort. What I love most about using air-chilled chicken is how naturally flavorful it is. Unlike water-chilled chicken, it doesn’t absorb excess moisture, which means the skin crisps up beautifully, and the meat stays juicy without any effort. It’s like starting with a head start toward perfection.
This recipe also keeps things wonderfully simple. No need for deep frying or a long list of ingredients. With just a few pantry staples and the right pan technique, you’ll get golden, crackly skin and tender meat that practically melts in your mouth. It’s ideal for busy evenings, yet elegant enough to serve guests.
And the best part? It always brings people to the table with smiles. Whether served with rice, roasted vegetables, or fresh salad, this dish feels hearty, balanced, and deeply satisfying. It’s comfort food with a touch of care — and that’s what makes it truly special.
How to Make It – Crispy Chicken, Step by Step
📝 Ingredients
You only need a few pantry staples and quality chicken to make this dish shine:
🍗 4 bone-in, skin-on chicken thighs (preferably air-chilled)
🧂 1 ½ teaspoons fine sea salt – helps draw out moisture from the skin
🧉 1 teaspoon freshly ground black pepper – adds depth and balance
🧄 1 teaspoon garlic powder – for that savory, earthy kick
🌿 1 teaspoon dried thyme or rosemary – to add warmth and aroma
🫒 2 tablespoons olive oil – for that perfect sear
🧈 1 tablespoon unsalted butter (optional, for basting at the end)

🔪 Instructions
1. Start by drying the chicken thoroughly
Use paper towels to pat the skin as dry as possible — this is the most important step. The drier the skin, the crispier the result. Moisture is the enemy of crunch!
2. Season with care and patience
In a small bowl, combine salt, pepper, garlic powder, and herbs. Rub this seasoning all over the chicken thighs, both skin and flesh sides. Don’t skip the edges — every bite should be flavorful. Let the chicken rest at room temperature for 20–30 minutes. This helps it cook more evenly and allows the seasoning to begin working its magic.
3. Heat the pan just right
Place a heavy-bottomed skillet (cast iron is perfect) on medium heat. Add the olive oil and wait until it shimmers — not smokes. You want the oil hot enough to sear, but not burn.
4. Skin-side down first — and don’t rush
Carefully place each thigh skin-side down. Press gently with a spatula to ensure full contact with the pan. Now — resist the urge to move them! Let them cook undisturbed for 8 to 10 minutes. The skin needs time to render its fat and get that beautiful, even crisp.
5. Flip and finish with patience
Once the skin is golden and crisp, flip the thighs. Reduce the heat slightly and continue cooking for another 10–12 minutes. If you’d like an extra layer of richness, add a tablespoon of butter and baste the chicken during the last 2 minutes.
6. Let it rest before serving
Transfer the chicken to a plate or board and cover loosely with foil. Resting for 5 minutes locks in the juices and ensures the meat stays tender and moist.
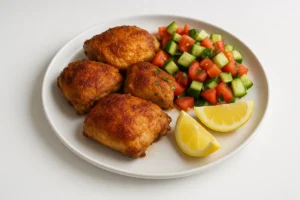
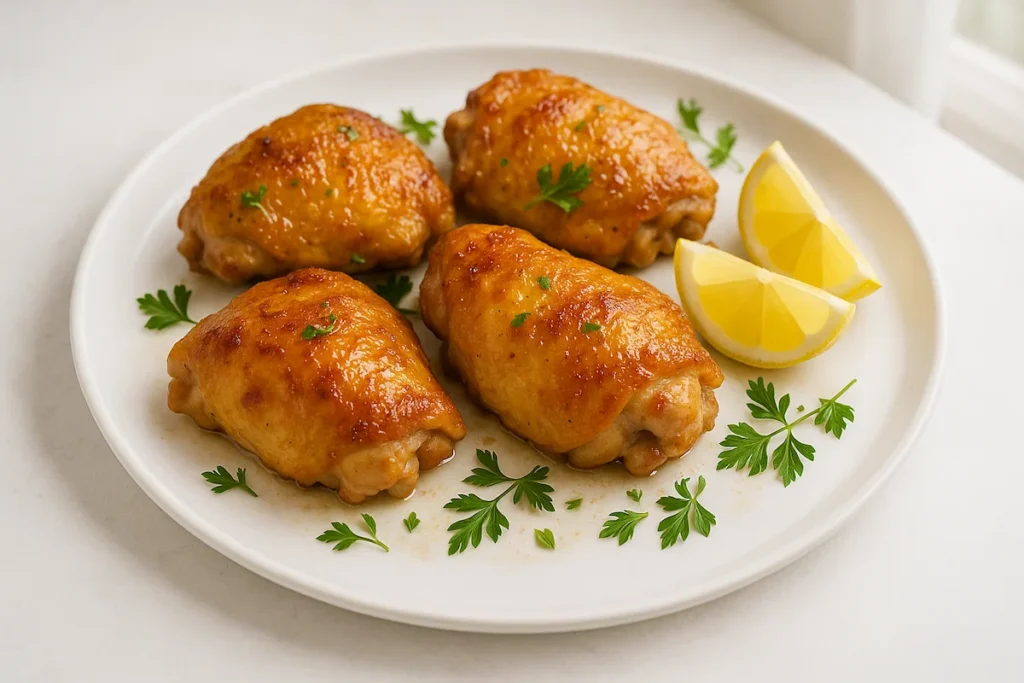
From Pan to Plate – How to Serve and Store It Right
After all that crisping, sizzling, and seasoning, it’s time to enjoy your chicken thighs at their best. Personally, I love serving them straight from the pan, placed on a wooden board or a warm platter — skin glistening and slightly crackling from the residual heat. Presentation matters, especially when something looks this good naturally.
For side dishes, you can keep things light or hearty depending on the occasion. A fresh chopped salad with lemon and olive oil brings brightness to the richness of the chicken. For something more filling, I often go with seasoned rice, roasted baby potatoes, or steamed vegetables with a drizzle of olive oil. You can even shred the meat and use it in wraps or over couscous for a next-day lunch that doesn’t feel like leftovers.

As for storage, let the chicken cool completely before refrigerating. Store it in an airtight container for up to 3 days. To reheat and keep the skin crispy, place it in a hot oven or air fryer for a few minutes — avoid microwaving if you want to preserve that crunch!
⚖️ Nutrition Info (Per Serving – 1 chicken thigh)
| Nutrient | Approx. Amount |
|---|---|
| Calories | 260 kcal |
| Protein | 22 g |
| Total Fat | 19 g |
| Saturated Fat | 5 g |
| Carbohydrates | 0 g |
| Fiber | 0 g |
| Sodium | 400 mg |
Values are estimated and may vary based on ingredient size and cooking method.
❓ Frequently Asked Questions
👉 What is the difference between air-chilled and water-chilled chicken?
Air-chilled chicken is cooled using cold, purified air after processing, while water-chilled chicken is submerged in cold water. Air-chilled meat retains more natural flavor and absorbs less moisture, which helps the skin crisp up more easily during cooking.
👉 How do you get extra crispy skin on chicken thighs?
Start by thoroughly drying the skin, season it well, and cook it skin-side down in a hot pan without moving it. Let the fat render slowly, and resist flipping too early. For extra crispness, avoid overcrowding the pan and finish with a quick butter baste.
👉 Is air-chilled chicken worth the extra cost?
Yes — especially if you want better texture and flavor. Because it doesn’t retain added water, it browns more evenly and stays juicy. Many home cooks and chefs find the difference noticeable and worth the investment for certain recipes.
👉 Can you air-fry air-chilled chicken thighs for crispy skin?
Absolutely! Air-chilled chicken works beautifully in the air fryer. Just season and preheat your fryer to 200°C (400°F), then cook skin-side up for about 20–25 minutes, flipping halfway through if needed. The skin gets wonderfully crisp without much oil.
🧡 A Message from Chef Joudia
I truly hope this dish brings warmth, flavor, and a little joy to your table. For me, cooking has always been about connection — with family, with tradition, and with the ingredients we choose. This simple yet satisfying recipe is a reminder that comfort food doesn’t need to be complicated. It’s about crisp textures, juicy bites, and shared moments around the table.
If you enjoy dishes like this one, I’d love for you to try my Crispy Garlic Parmesan Chicken Thighs. It’s another flavorful, crispy favorite that’s quick to make and sure to impress. May your kitchen always be full of good smells, good food, and even better memories.